Many a times, in development other services are needed for the development, such as Database, Redis cache, File Server etc, and installing everything separately is a cumbersome task. For this purpose, developers are using docker-compose for so many years.
A good news is devcontainer natively supports docker-compose.yml file just like Dockerfile for everyday development needs.
PHP & MySQL devcontainer using docker-compose
We will be using the same Dockerfile developed in the previous part of the series. If you want to install the mysql libraries for PHP you can add the following in the root stage of the Dockerfile.
# Install PHP extensions
RUN docker-php-ext-install mysqli pdo pdo_mysql
Let’s deep dive into creating devcontainers using docker compose. Create the standard docker-compose.yml file in your project’s root directory.
version: '3.8'

services:
  web:
    build:
      context: .
      dockerfile: Dockerfile
    ports:
      - "8080:80"
  db:
    image: mysql:5.7
    restart: always
    environment:
      MYSQL_ROOT_PASSWORD: projectasuras
      MYSQL_DATABASE: sample
      MYSQL_USER: projectasuras
      MYSQL_PASSWORD: projectasuras
    ports:
      - "3306:3306"

networks:
  dev-network:
In the above, docker-compose.yml file, we can see that two services namely web and db are defined.
webservice defines our PHP web application in aDockerfilewhich was developed in the last part of the series in the current context (asdocker-compose.ymlfile resides on project’s root directory) and exposes port80from container to8080on host machinedbservice creates a MySQL server using container imagemysql:5.7hosted at Docker Hub, and initialises the database parameters such as database name and credentials. It also, exposes the port3306of mysql (which can be eliminated for security purposes, as containers can communicate with each other due to sharing of network).
You can learn more about docker-compose.yml file from Docker Docs.
We will now make the changes in our devcontainer.json file as follows:
{
    "name": "Test Application Dev Container",
    "dockerComposeFile": "../docker-compose.yml", // Path to docker-compose.yml
    "service": "web", // Service to connect
    "workspaceFolder": "/var/www/html",
    "mounts": [
        "source=${localWorkspaceFolder},target=/var/www/html,type=bind"
    ],
    "remoteUser": "asura",
    "customizations": {
        "vscode": {
            "extensions": [
                "bmewburn.vscode-intelephense-client",
                "esbenp.prettier-vscode",
                "xdebug.php-debug",
                "ms-azuretools.vscode-docker"
            ],
            "settings": {
                "php.validate.executablePath": "/usr/local/bin/php",
                "php.validate.run": "onType"
            }
        }
    }
}
There are various fields which are eliminated:
build, asDockerfileis not directly used for creating devcontainer (it is being used insidedocker-compose.ymlfile)postStartCommand, we have initially stated the initial command to run for the container in ourDockerfileasapache2-foreground. You can keep other commands if the same are specific to devcontainers.appPort, similar tobuild, ports of each service is defined insidedocker-compose.ymlfile.
There are two fields specific to docker-compose which are added to devcontainer.json file:
dockerComposeFile: location of docker compose file relative to.devcontainerdirectory.service: service name in which our devcontainer will be mounted, in our case the web application.
Note
If you want to initialise the database like creating tables or inserting some data, we can achieve that by using another
Dockerfilededicated to MySQL and build the image just like inwebservice.
Initialise MySQL database
Now, let’s navigate towards pre-configuring the database for our development and deployment environments. For the purpose of separating the context (for easy readability of codebase), let’s create a directory named mysql which will reside all the necessary mysql related files.
Let’s create our initialisation file named init.sql (under mysql directory) which will contain all the SQL commands which are needed for properly initialising the development environment.
-- Create the 'organization' table
CREATE TABLE organization (
    organization_id INT AUTO_INCREMENT PRIMARY KEY,
    name VARCHAR(100) NOT NULL,
    location VARCHAR(100)
);

-- Create the 'employee' table
CREATE TABLE employee (
    employee_id INT AUTO_INCREMENT PRIMARY KEY,
    first_name VARCHAR(50) NOT NULL,
    last_name VARCHAR(50) NOT NULL,
    email VARCHAR(100) UNIQUE NOT NULL,
    hire_date DATE,
    organization_id INT,
    FOREIGN KEY (organization_id) REFERENCES organization(organization_id)
);

-- Insert some organizations
INSERT INTO organization (name, location) VALUES
('Tech Innovations Inc.', 'San Francisco'),
('Health Solutions Ltd.', 'New York');

-- Insert some employees
INSERT INTO employee (first_name, last_name, email, hire_date, organization_id) VALUES
('John', 'Doe', 'john.doe@example.com', '2023-01-15', 1),
('Jane', 'Smith', 'jane.smith@example.com', '2023-03-22', 1),
('Emily', 'Johnson', 'emily.johnson@example.com', '2024-07-10', 2);
Now, we will create a separate Dockerfile for MySQL under mysql directory.
FROM mysql:5.7

ADD init.sql /docker-entrypoint-initdb.d
If you note, we are adding the init.sql file inside /docker-entrypoint-initdb.d directory which will be automatically called by the mysql server during initialisation phase.
To use this newly created Dockerfile, we need to add build parameter instead of image in our docker-compose.yml file. The following are the changes required in our db service of docker-compose.yml file.
  db:
    build:
      context: mysql/
      dockerfile: Dockerfile
    restart: always
    environment:
      MYSQL_ROOT_PASSWORD: projectasuras
      MYSQL_DATABASE: sample
      MYSQL_USER: projectasuras
      MYSQL_PASSWORD: projectasuras
    ports:
      - "3306:3306"
After running this devcontainer, execute the docker ps -a command inside the terminal (Linux/macOS) or command prompt (Windows) to check the running containers (from host machine). We will be able to see two containers running the web and db service.

Now, we will connect to the db service terminal using docker exec -it <container_name> /bin/bash command.

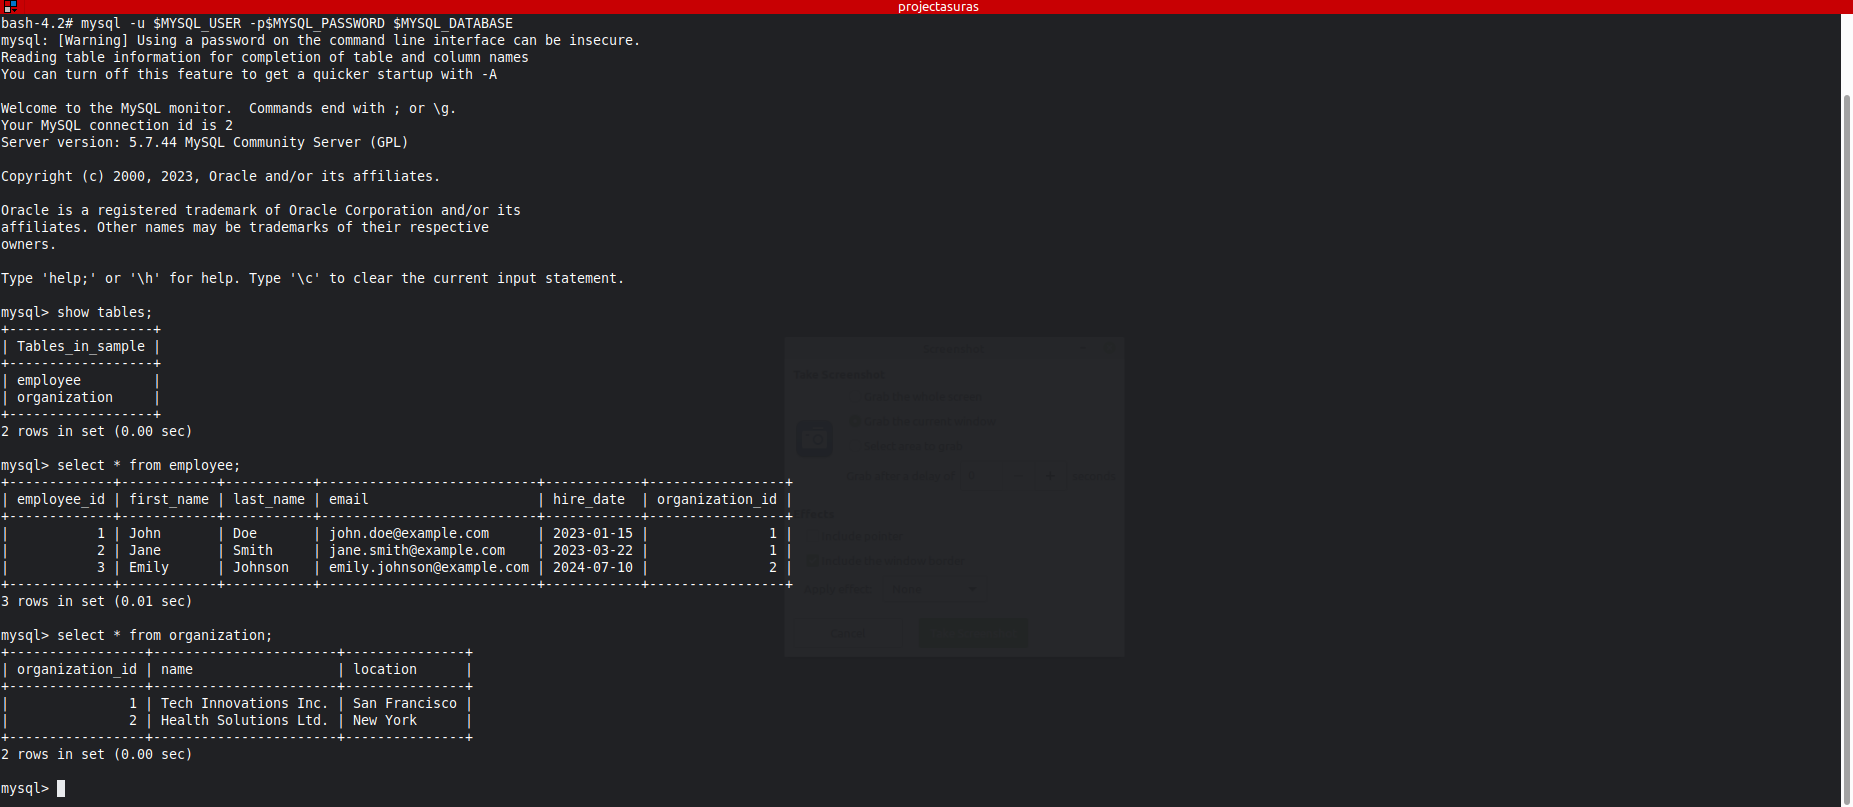
Once, we are able to access the container, we will connect to mysql server (note that these variables are defined in our docker-compose.yml file)
mysql -u $MYSQL_USER -p$MYSQL_PASSWORD $MYSQL_DATABASEVoila! We can now trigger our SQL commands to check whether our init.sql script is loaded into the DB or not. The following screenshot shows that all the sql statements present in the init.sql are executed onto database.
Next Steps
Congratulations, on completing this micro-series on devcontainers.
The series took you through development of basic to advanced devcontainers in Golang and PHP language.
But, so much trouble configuring devcontainer for other languages, right?
We have got you covered. Check out our Github profile and locate the devcontainer-templates repository for pre-configured devcontainers for various popular languages.
You also join use on Discord, for keeping you updated on the latest stuff happening in the tech space and if you have any suggestions, feel free to ping the moderators at our Discord Channel or you can join our community at Github.
You can also checkout our Miscellaneous guide on devcontainer for re-opening a project inside a devcontainer and installing your own required extensions inside devcontainer.